Features
The sequencerOTIO panel lives in the Sequencer sidebar (N-panel), in three collapsible sections: Configuration, Export, Import. See Configuration for the first one.
Export
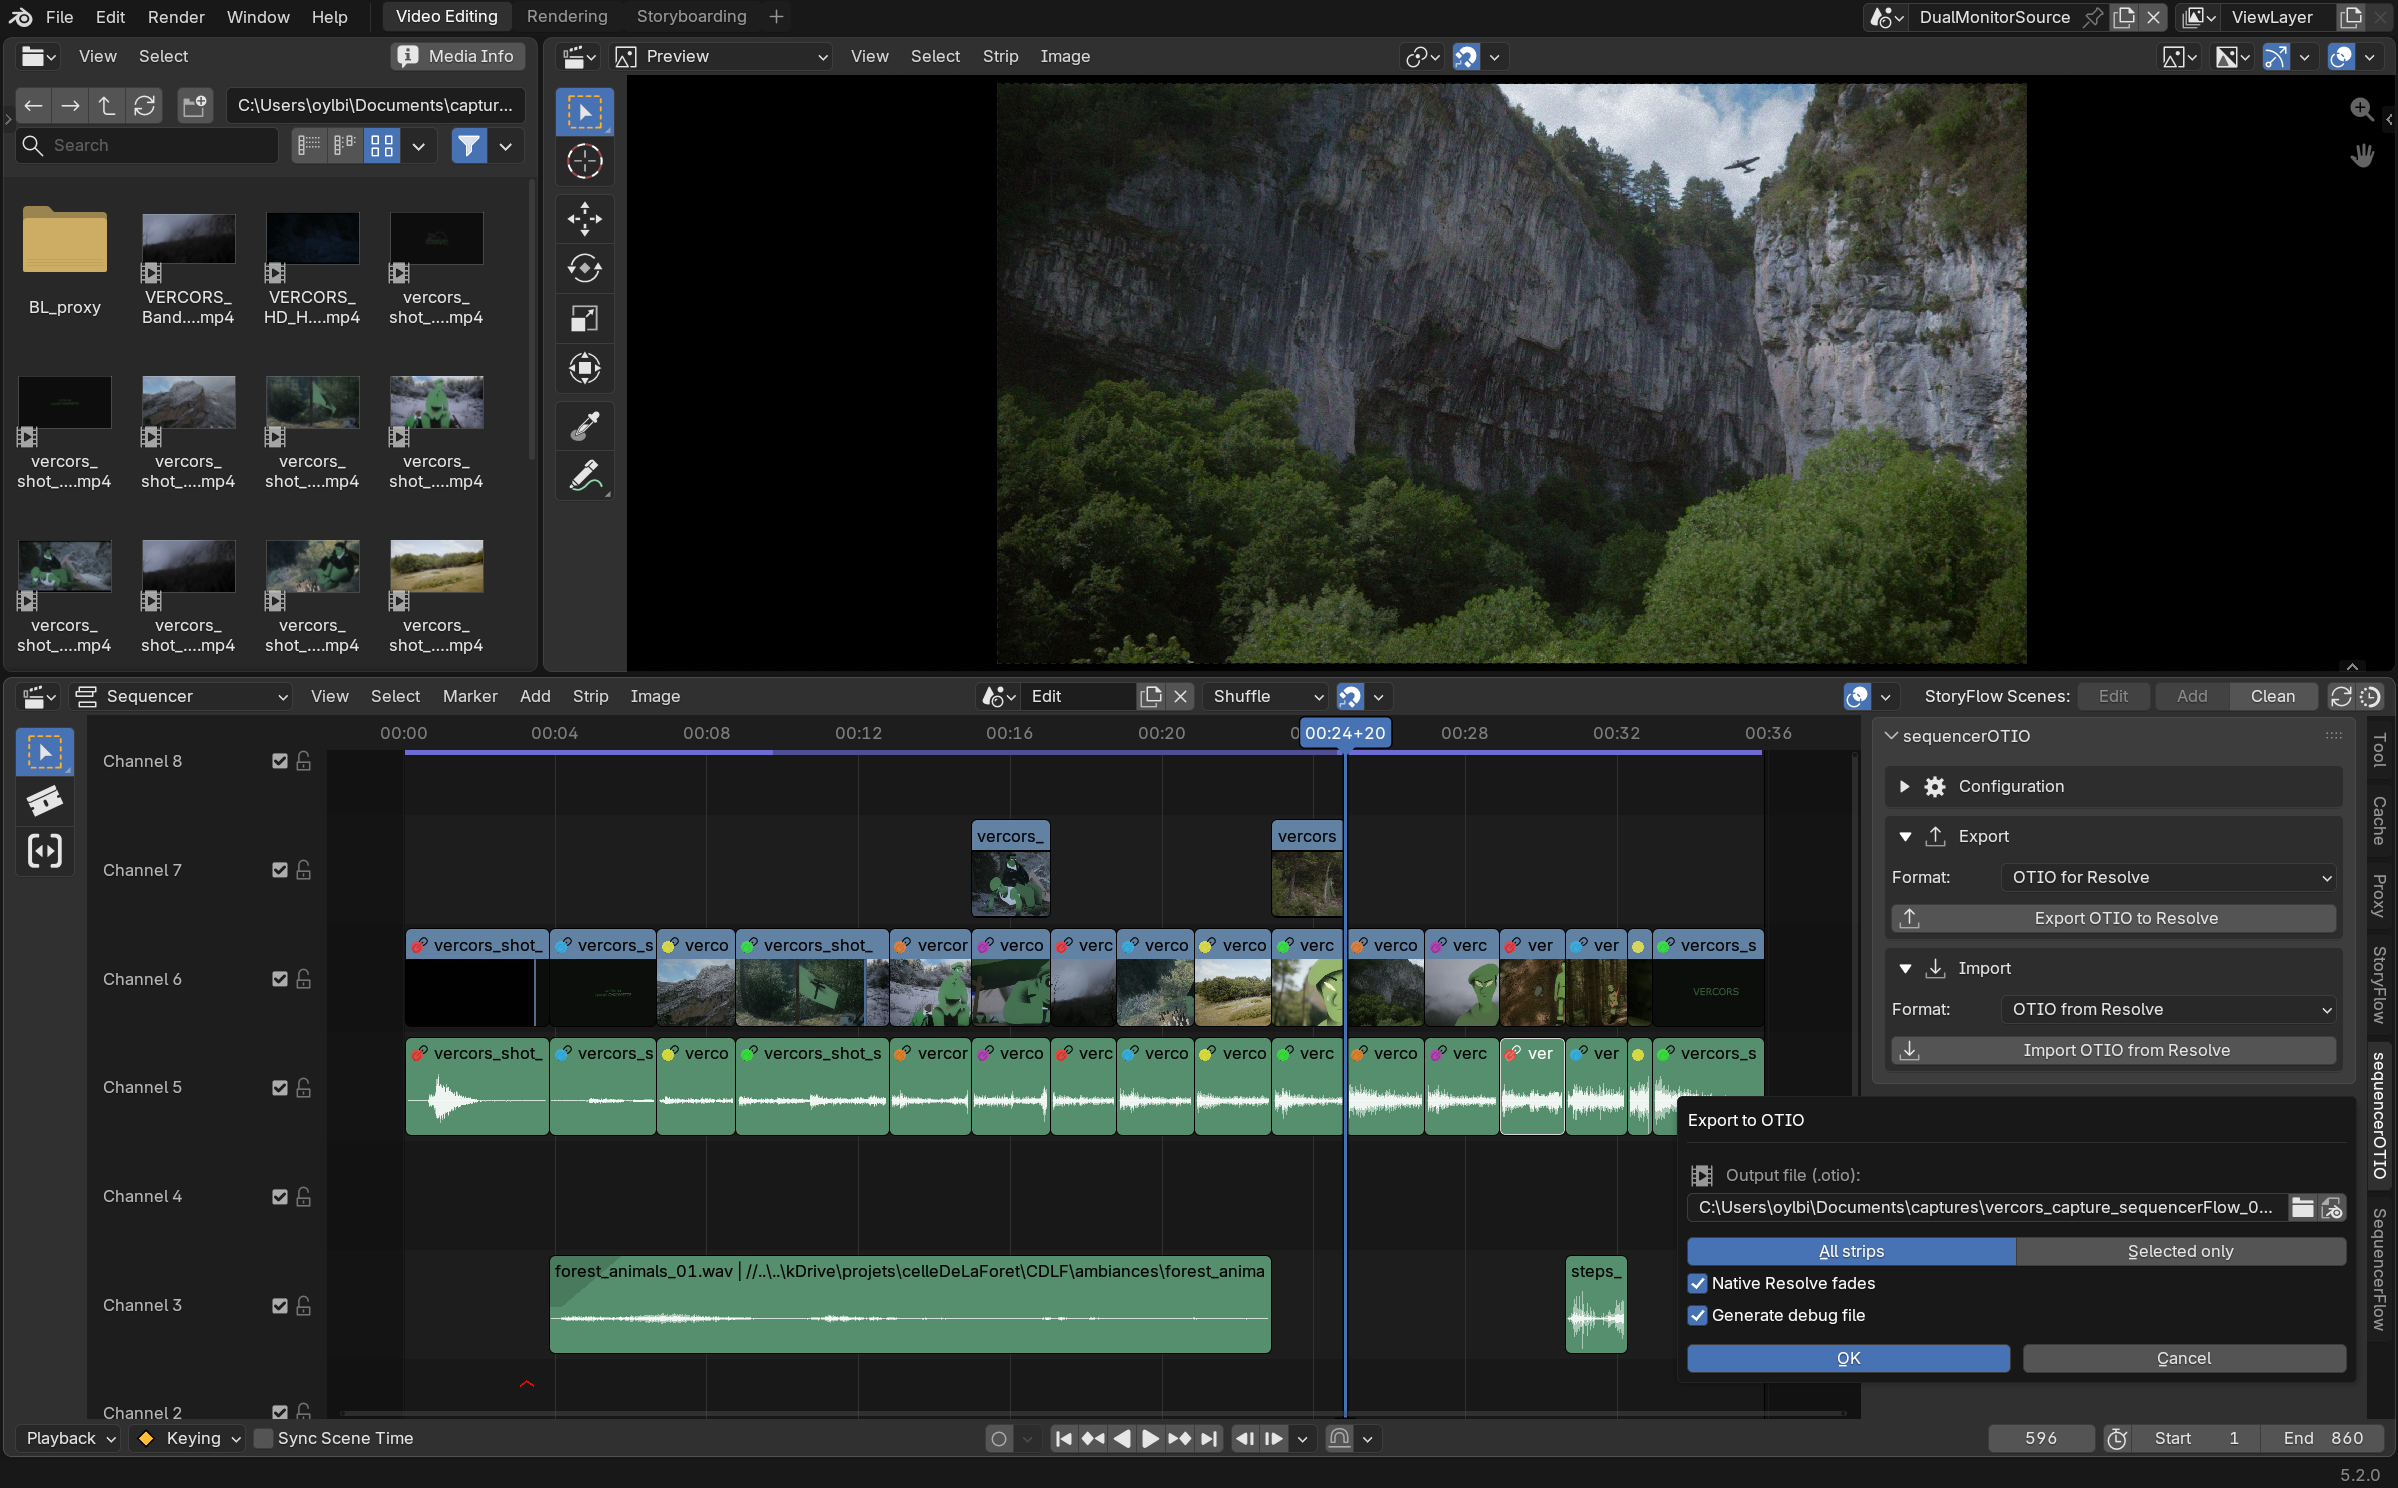
Turns the current VSE edit into a .otio file tuned for Resolve.
Options:
- Export Folder / Filename — where the
.otiofile is written. An Update Paths action fills both in automatically from the current.blendfile's own location and name. - Scope: All strips, or Selected only — export the whole timeline, or just the strips you've selected, without having to temporarily hide or isolate anything.
- Native Resolve Fades (on by default) — converts a pure fade at a clip's edge (opacity/volume ramping to zero) into Resolve's own native video transition or audio fade, instead of leaving it as raw opacity/ volume keyframes. An editor picking up the timeline in Resolve gets real fade handles to grab, not keyframes to decode.
- Debug Export — writes a companion debug report next to the
.otiofile and loads it straight into Blender's text editor, so you can see exactly what was written without digging through a hidden log.
What always gets carried over, regardless of these options:
- One OTIO track per Blender channel actually in use — including empty
channels, so the track layout survives the round-trip. Blender's lowest
video channel becomes
Video 1; audio channel order is flipped to match how Resolve stacks its audio tracks. - Volume/opacity keyframes as Bézier curves, never flattened.
- Speed changes and freeze frames, encoded as OTIO
TimeEffects.
Paths and media relinking
If a media source referenced by the edit lives outside the export folder, Resolve may not relink it automatically — the export warns you (debug report + popup) when this happens, so you know to relink manually or re-export alongside the media.
Import
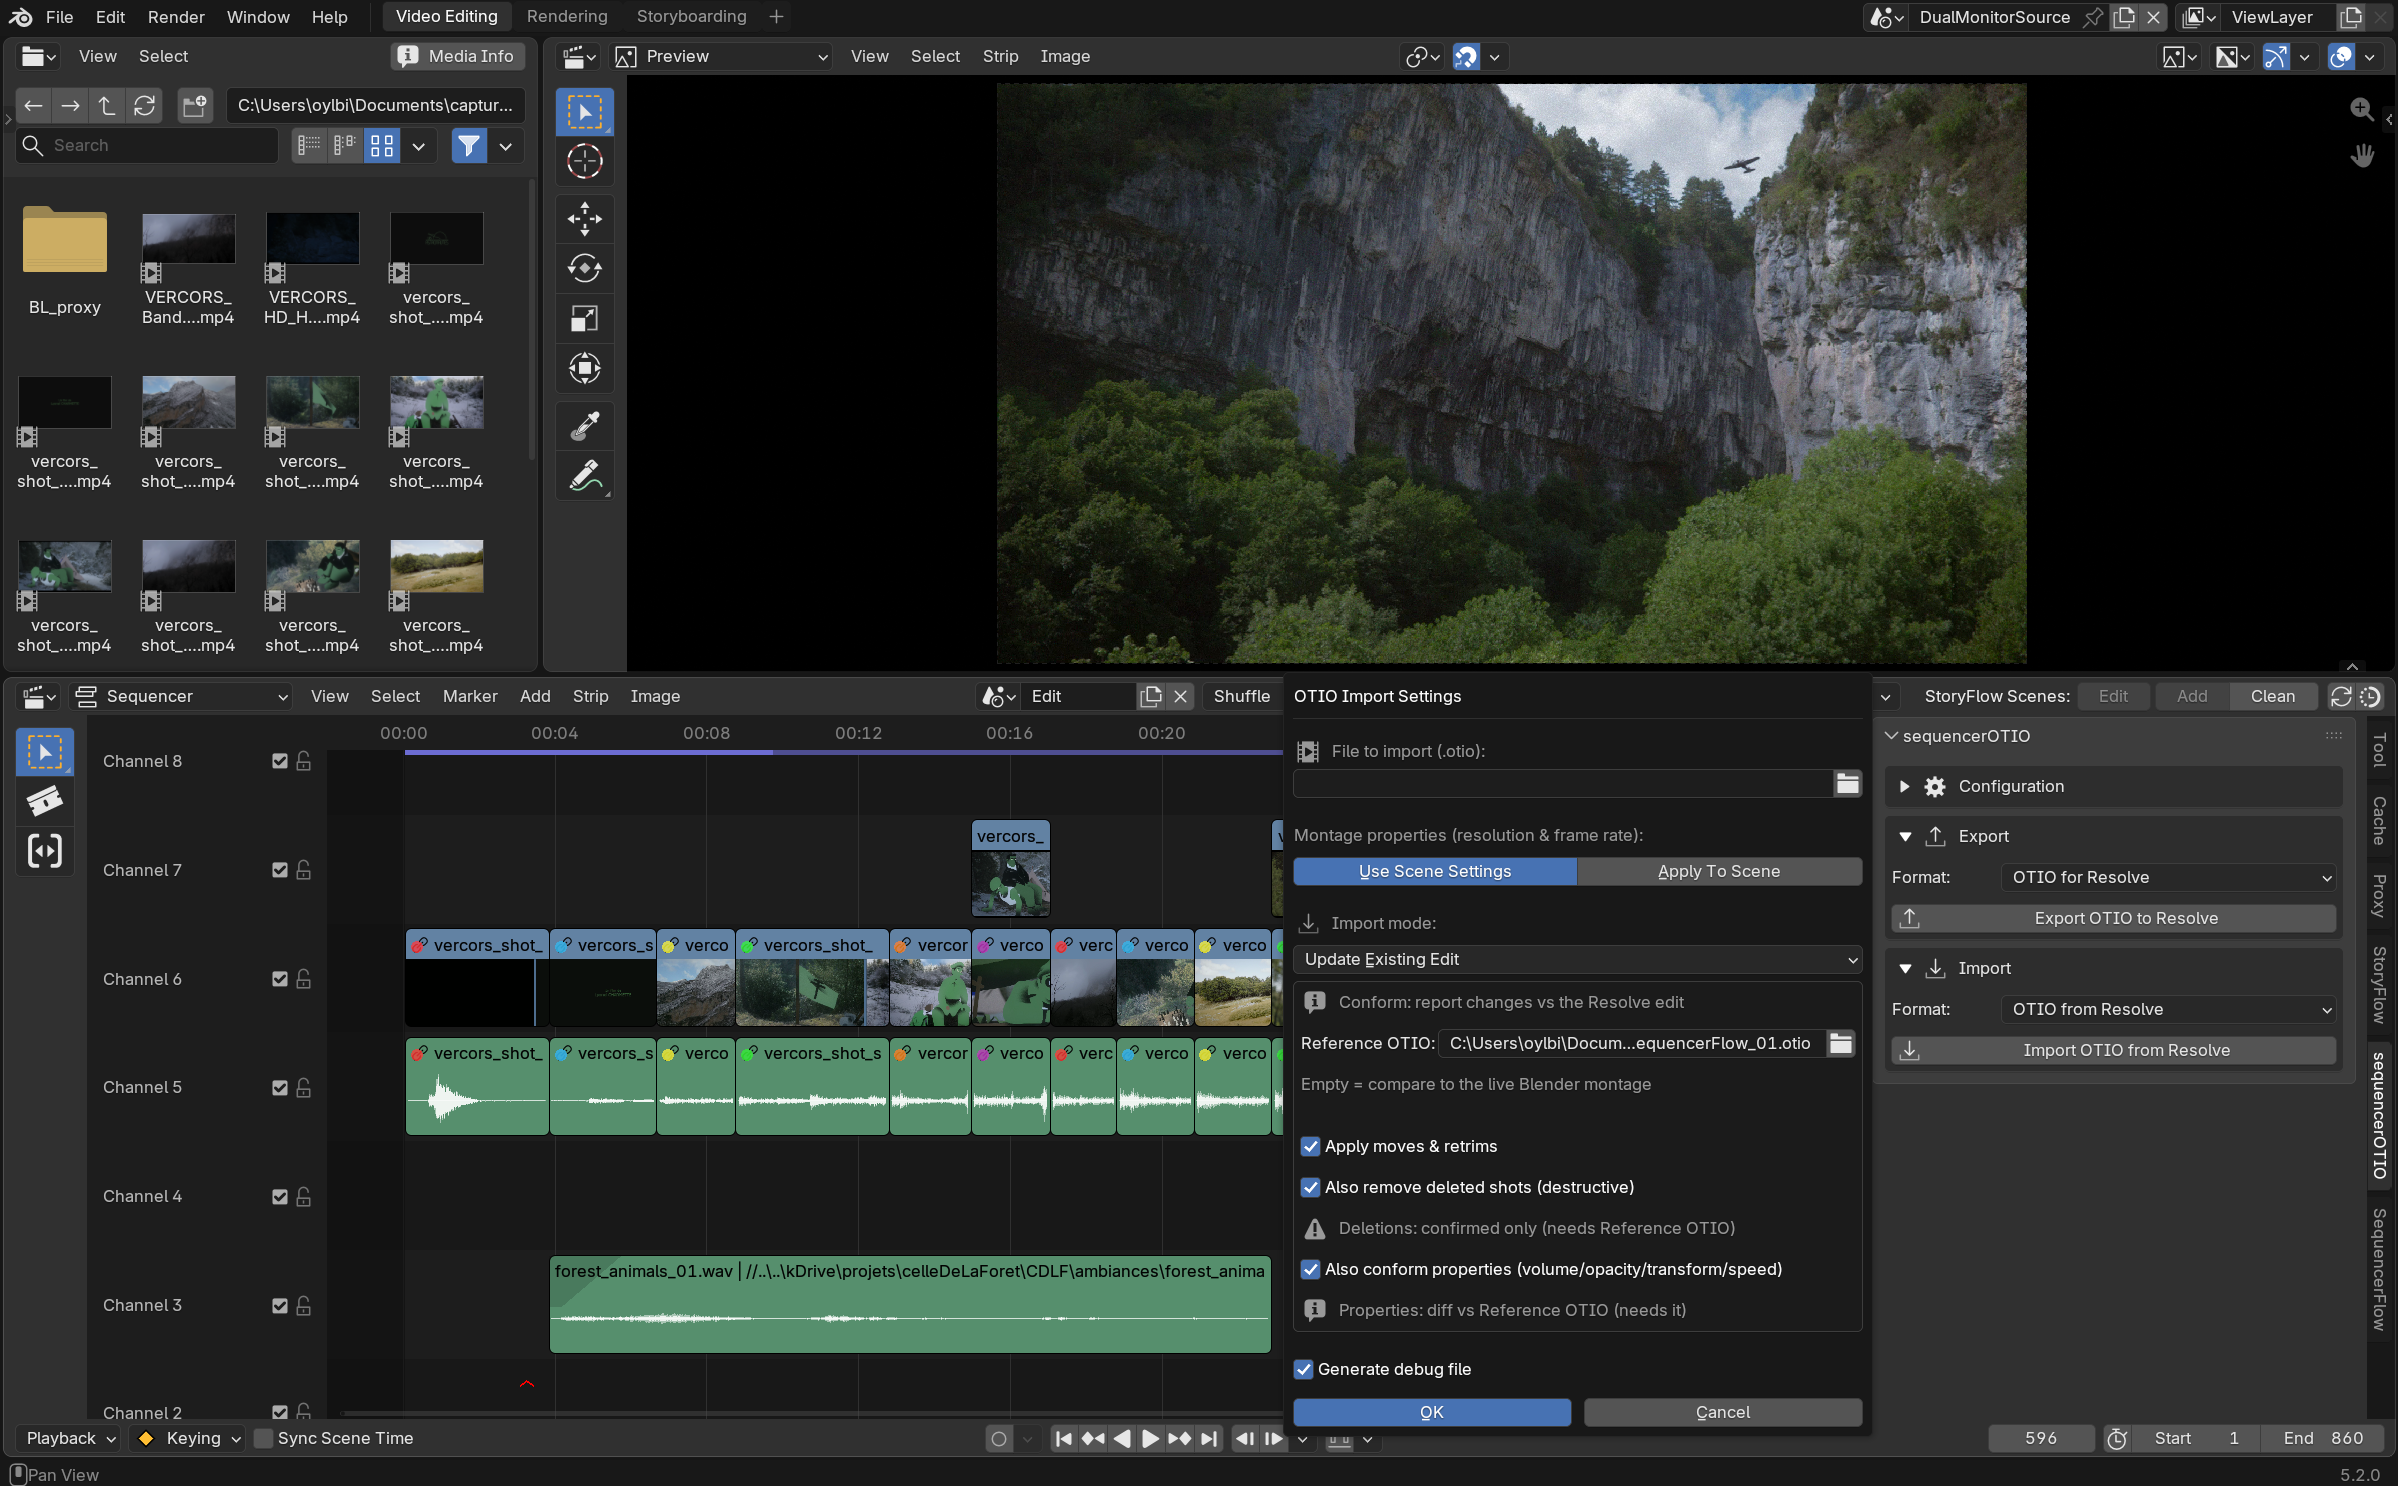
Bringing a .otio back from Resolve, in one of four modes:
| Mode | What it does |
|---|---|
| Add To Current Scene | Imports alongside whatever's already there. |
| New Scene | Creates a dedicated scene for the import, leaving the current one untouched. |
| Replace Current Edit | Clears the scene's VSE first, then imports — a full re-sync. |
| Update Existing Edit (Conform) | Compares the current montage to the Resolve edit and reports — or applies — just the differences. See below. |
Montage properties (resolution and frame rate, read from the OTIO file
by default) can instead be set manually and applied to the scene — useful
when the .otio doesn't carry reliable project settings. A Resolution
dropdown offers common presets (HD, UHD 4K, DCI 2K/4K, SD PAL/NTSC, square,
vertical, anamorphic scope) alongside a custom width/height.
Conform (the round-trip mode)
Compares the live Blender edit against the Resolve export and classifies every clip:
| Status | Meaning |
|---|---|
| Unchanged | No difference detected |
| Moved | Position changed |
| Retrimmed | In/out points changed |
| Split | Clip was cut into more than one piece |
| Changed | Properties (opacity, volume, transform, speed) differ |
| New | Present in the Resolve export, not in Blender |
| Deleted | Present in Blender, missing from the Resolve export |
Conform options:
- Reference OTIO (optional) — the original Blender export, the "before" state. Without it, conform compares against the live Blender edit directly; providing it sharpens the diff (in particular, it's required to confirm real deletions, see below).
- Apply moves & retrims — off by default, meaning conform first runs as a dry-run report with nothing applied. Turn it on to actually move and retrim the matching strips.
- Also remove deleted shots (destructive) — removes strips confirmed as deleted by comparing against the Reference OTIO. Never removes anything without that reference to confirm the deletion is real, not just a clip conform couldn't match.
- Also conform properties — reapplies volume, opacity, transform and speed (and fades, via opacity/volume) wherever they differ between the reference export and the Resolve return. Also requires the reference.
- Generate debug report (on by default) — same debug file as export, written next to the imported OTIO and loaded as a text block.
You can then apply just the changes you want — nothing gets blindly re-imported, so edits made inside Blender after the original export aren't discarded just because Resolve sent something back.
What's in scope for conform
Conform works on any strip backed by real media (video/image/sound clips). Color strips, text strips, drawing scenes and adjustment layers sit outside the diff and are left untouched.