Features
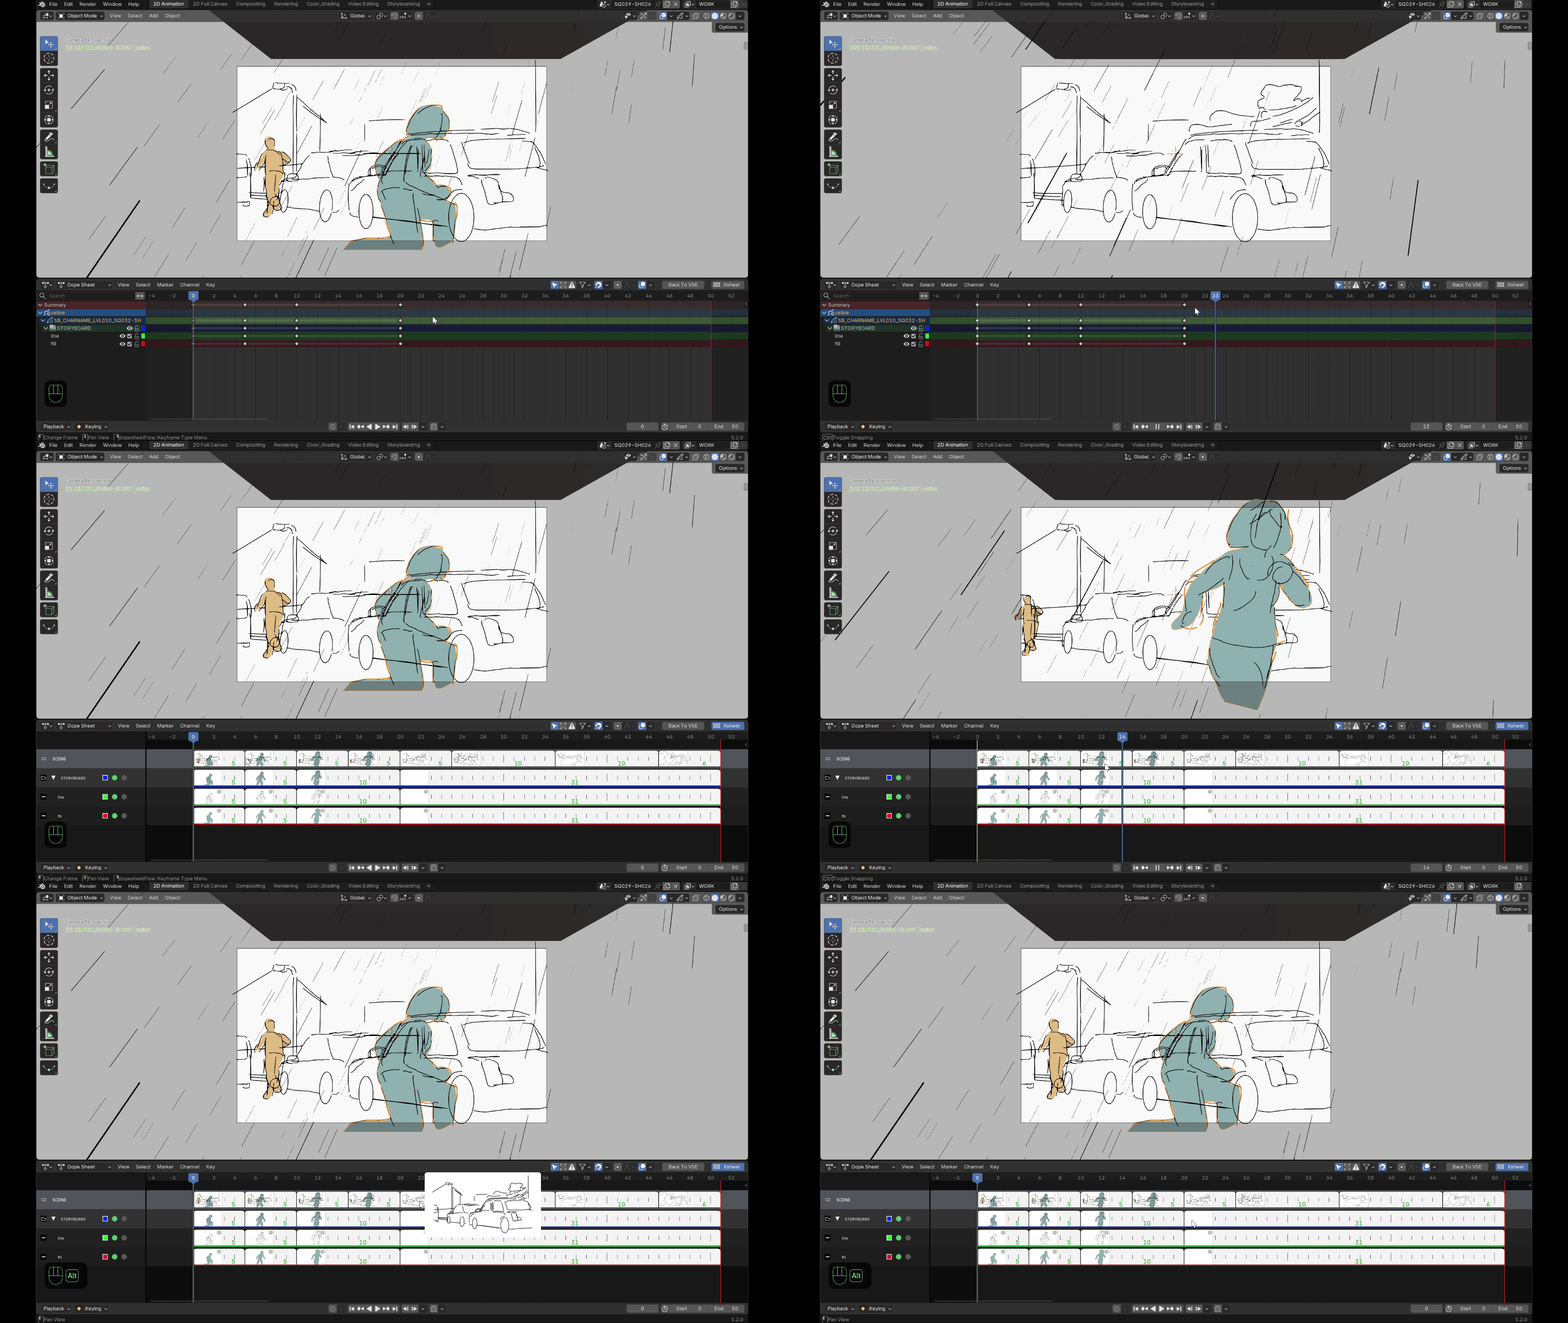
(general overview — see each feature in detail below)
Real thumbnails
Every key is displayed as an actual thumbnail of the drawing, generated through direct GPU rasterization of the Grease Pencil strokes — not a full scene render. Material color, vertex paint and fill color are all taken into account, matching what you see in the viewport.
Thumbnails are cached: a key is only regenerated if its content actually changed. On a very dense drawing, generation happens in small batches in the background so the interface never blocks — you'll briefly see a placeholder before the real thumbnail appears.
Scene / Summary / Groups / Layers hierarchy
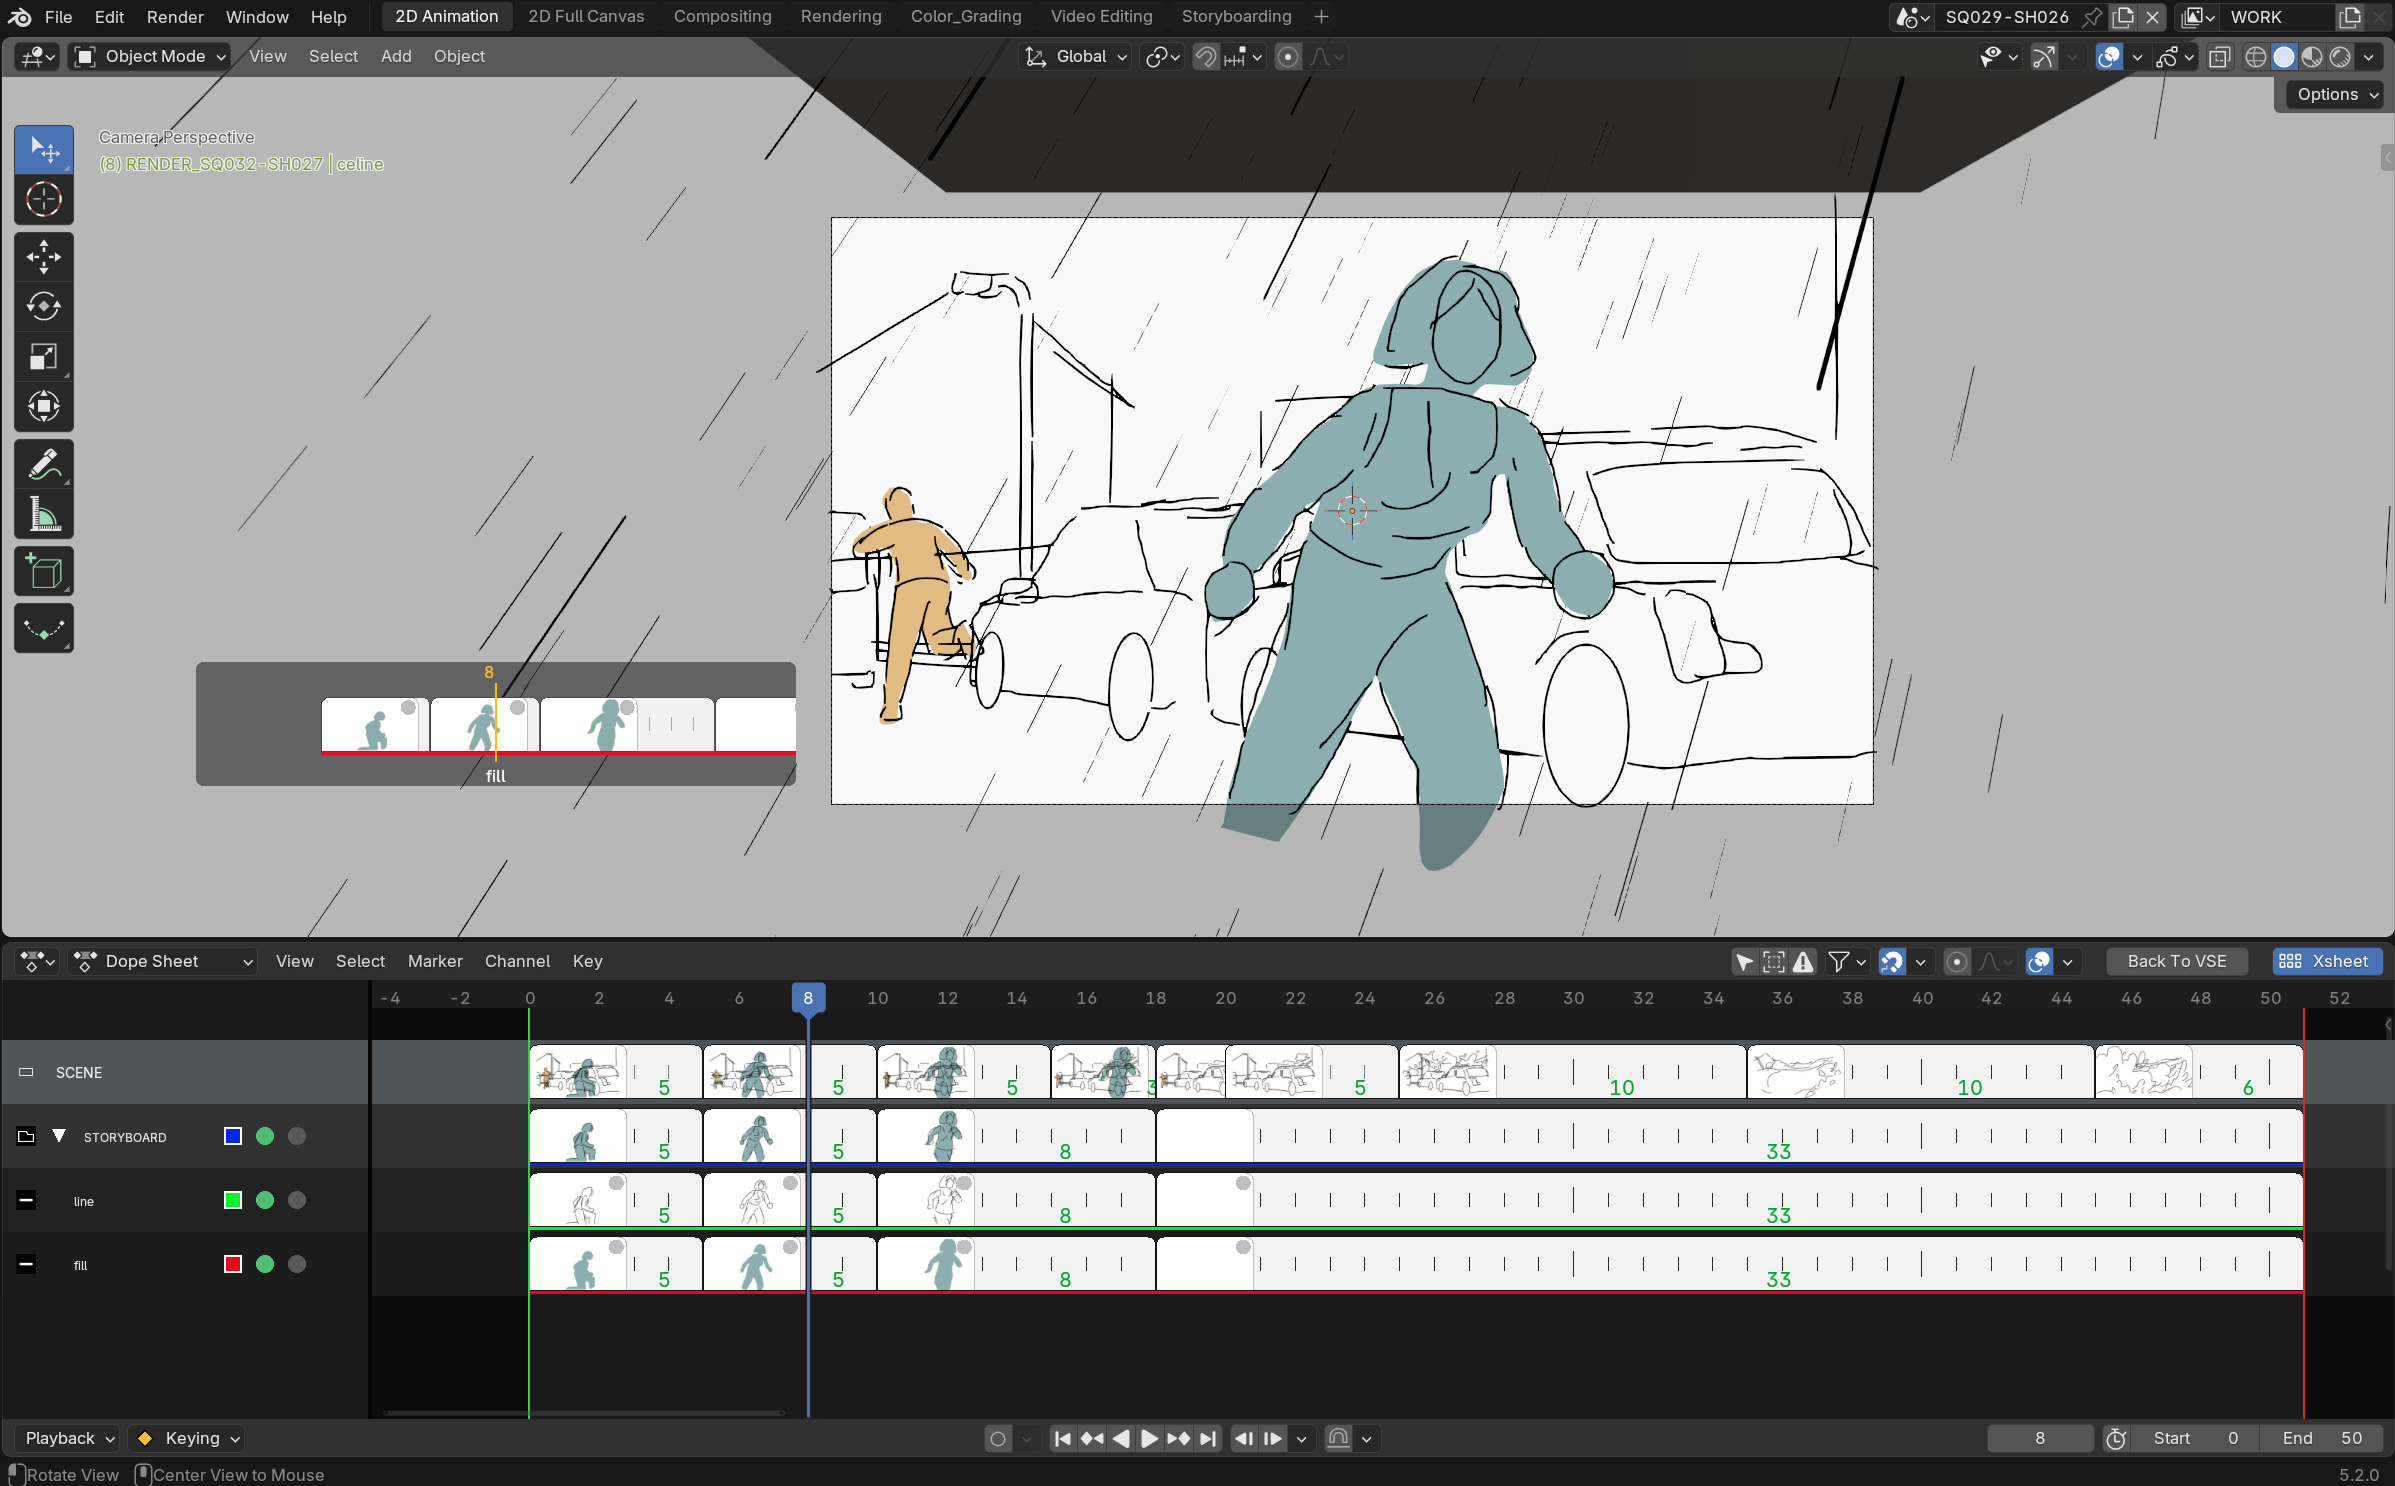
Four levels of rows, each with its own composite thumbnail:
- Scene: composite of every visible Grease Pencil object in the scene.
- Summary: composite of every visible layer of an object.
- Group: composite of the visible layers in that group.
- Layer: the actual drawing, key by key.
Each level can be shown or hidden independently from the N-panel (see Preferences).
Moving a key (trim / ripple)
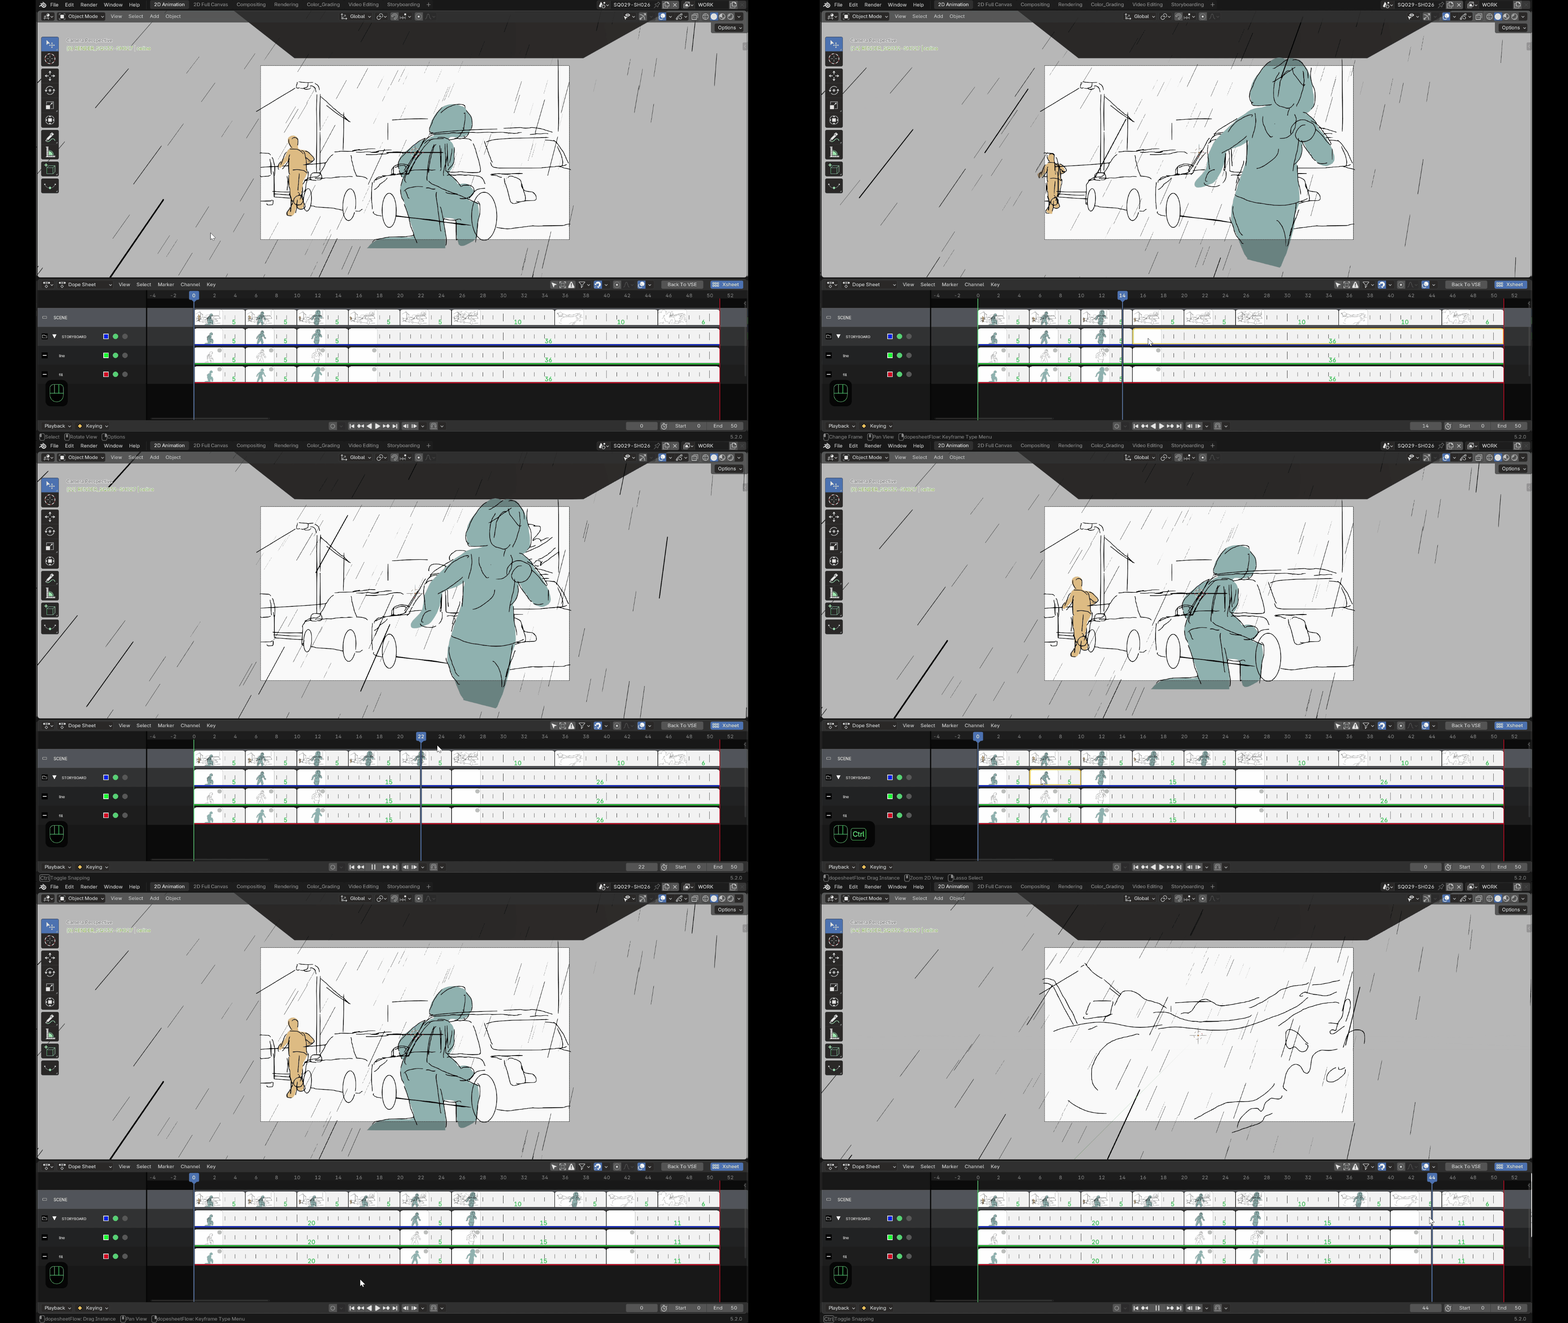
Click and drag a thumbnail to move its key in time:
| Mode | Effect |
|---|---|
| Trim (no modifier) | Only the selected keys move (together, relative spacing kept), clamped so they never pass the nearest non-selected neighbor on either side. |
| Ripple (Ctrl held) | The selected keys and everything that follows them shift together by the same amount — only the preceding key (which never moves) bounds the movement. |
Multi-selection and groups
- Shift+click a thumbnail to add or remove a key from the selection, including across several layers or groups.
- Dragging a group's thumbnail actually moves the matching key on every one of its child layers — the group behaves as a parent.
Floating preview (Alt + hover)
Hold Alt while hovering any thumbnail to show an enlarged floating preview near the cursor — handy for judging a drawing without leaving the xsheet overview. Its size is adjustable (Hover Preview Scale in the addon's own N-panel, see Preferences).
Isolating a row
An Isolate button on each row hides every other row (a real Blender hide, not a simple display filter). Shift+click stacks isolation across several rows at once. Isolating a child layer automatically makes its chain of parent groups visible.
Channel color and keyframe type
- A color swatch in the channel column lets you change a layer or group's color directly from the overlay (the same native color wheel as Blender).
- A keyframe type dot, in the corner of each thumbnail, opens a
right-click menu to pick the keyframe type (same types and icons as
Blender's native
keyframe_type).
Renaming a layer or group
Double-click a layer or group's name (outside the icons) to open a rename popup. Name collisions are handled automatically by Blender, just like any native layer.
3D viewport scrubbing
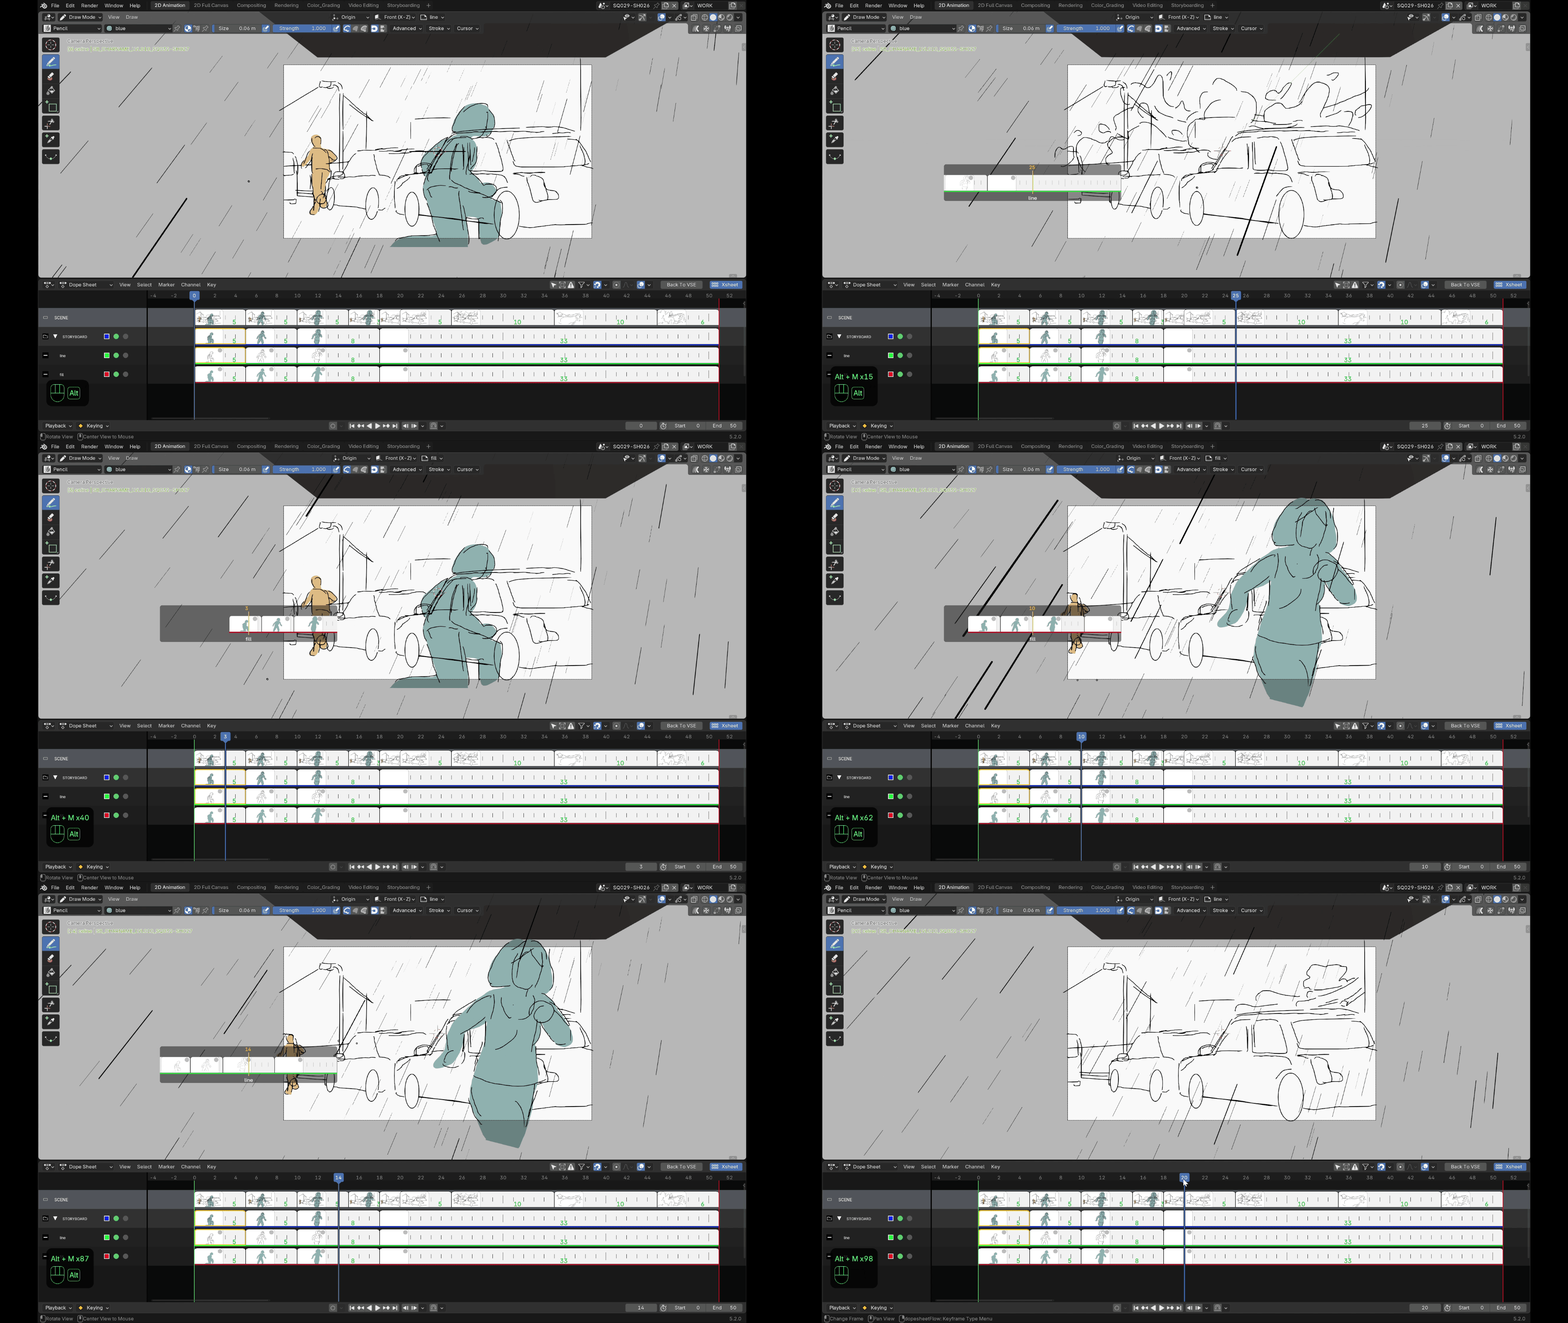
In the 3D view, hold Alt+M (customizable shortcut, see Preferences) to show a thumbnail scrubber near the cursor, without ever leaving the 3D view:
- Drag horizontally to scrub through the active layer's keys in time.
- Move the mouse vertically to switch which layer is being scrubbed — a real, persistent change once the key is released, not a temporary preview. Hidden layers (or layers whose parent group is hidden) are never reachable this way.
- The cursor wraps around screen edges while scrubbing, just like Blender's native tools — you can keep scrubbing without ever being blocked by the window edge.
No onion skin in thumbnails
Showing neighboring drawings (before/after) faded inside the thumbnail itself was tried and abandoned: since the rasterized ink is black, a simple opacity setting makes the ghost unreadable rather than useful. A true recoloring would require a dedicated shader, not available today.